This is a continuation of my Spyder Colorimeter Concept Design Project. After the initial prototype I did some some injection molding analysis in SolidWorks Plastics. The analysis and further research shed light on some areas that could be improved upon.
I ran the simulation with default setting of 100MPa injection pressure limit, 230ºC melt temp, 50ºC mold temp, 4 sprues, and generic ABS plastic. The result was a fill time of 3.2 seconds and an average cooling time of 16.86 seconds.
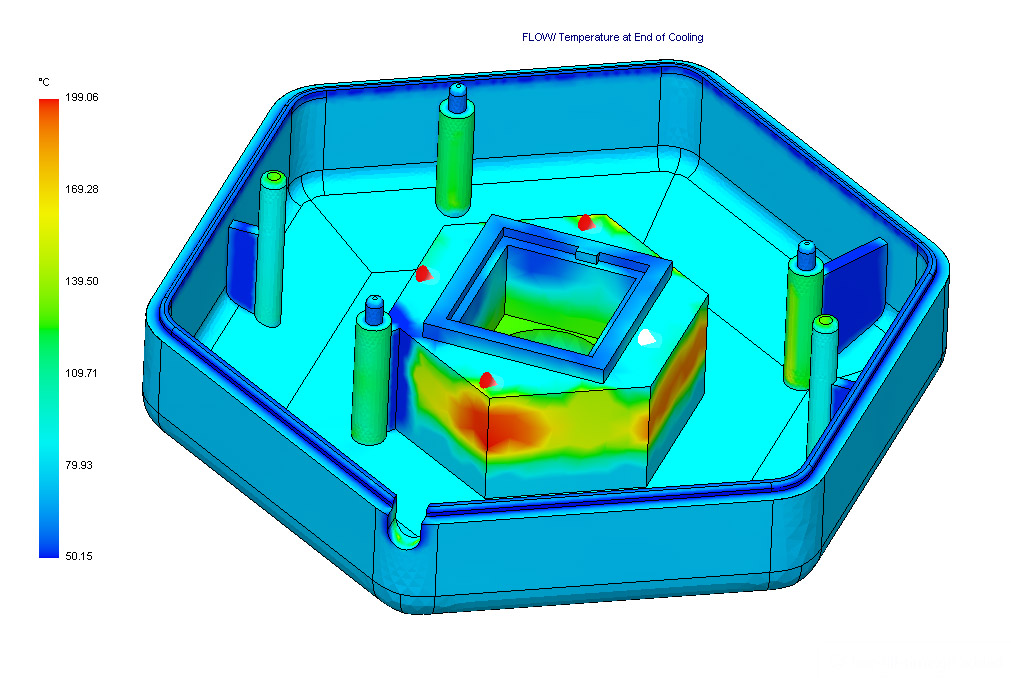
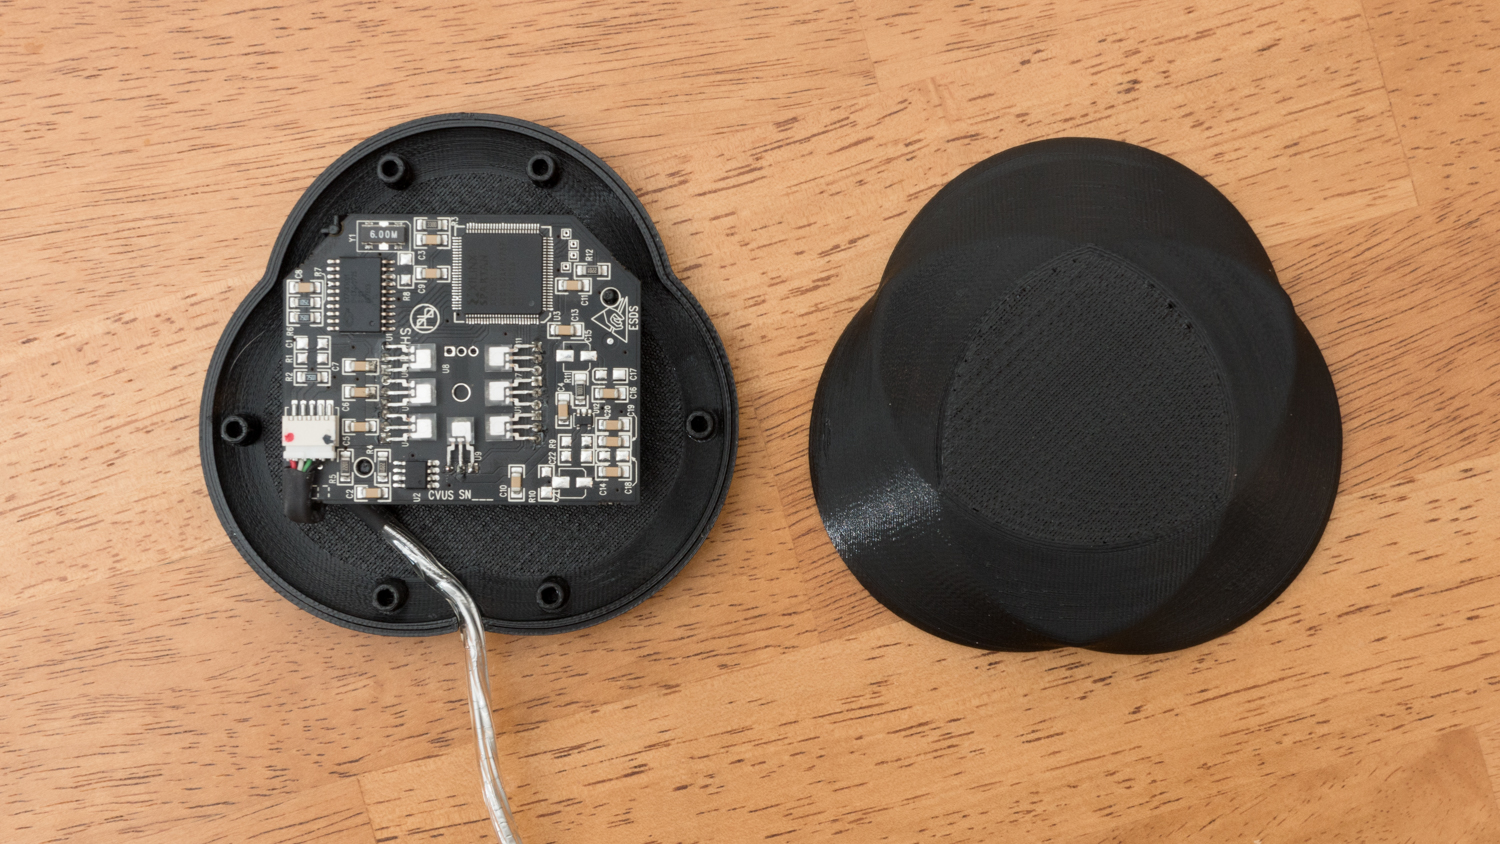
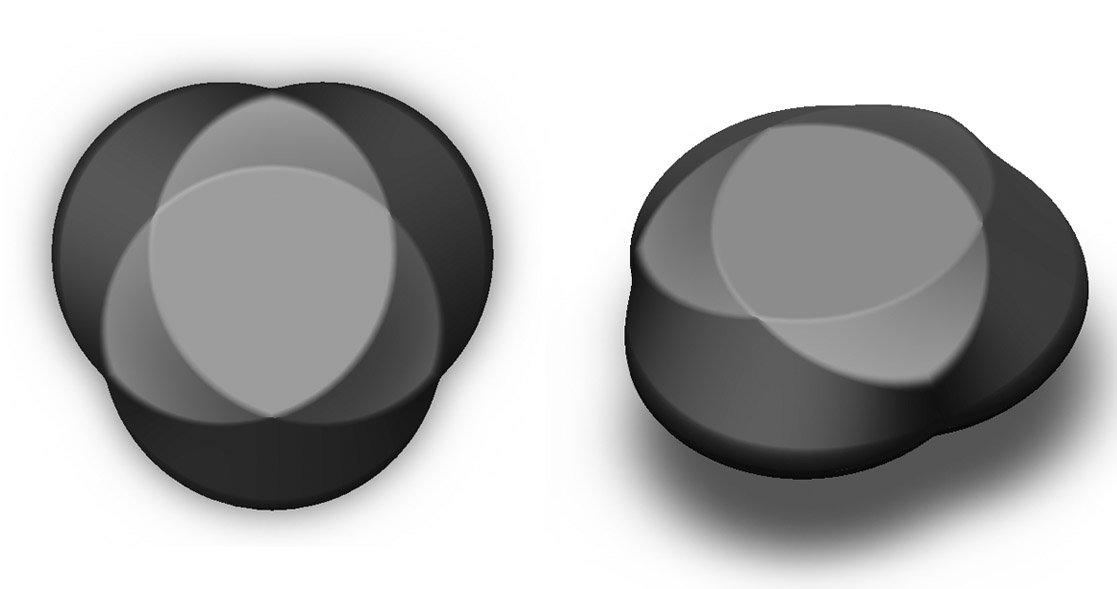
The plot of the temperature after cooling highlighted some potential problems, the structure has walls much to thick which would likely lead to shrinkage not to mention extra cooling tome, and wasted material. After seeing the simulation and doing some research into the design principles of injection molding I decided to design a physical prototype of the RGB vendiagram concept (from the previous post).
The goal of the second design is to improve upon the weaknesses of the first prototype, specifically focusing on the following:
- Keeping wall thickness to .15” or less, assuming a plastic like ABS will be used
- Avoiding vertical surfaces and using a draft angle of 2º or more
- Using fillets for a stronger transition where features meet
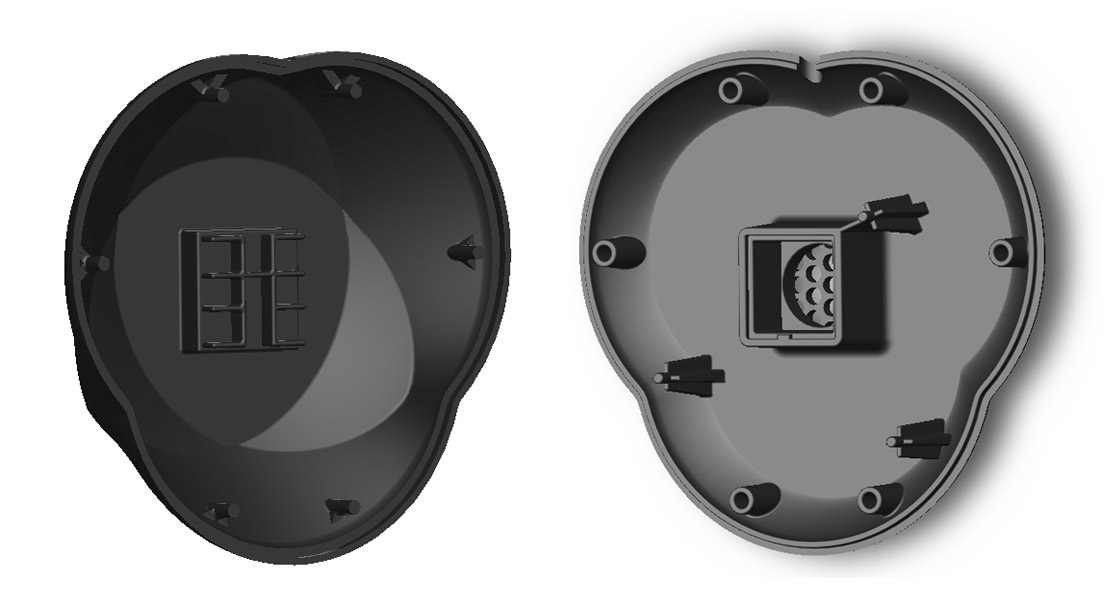
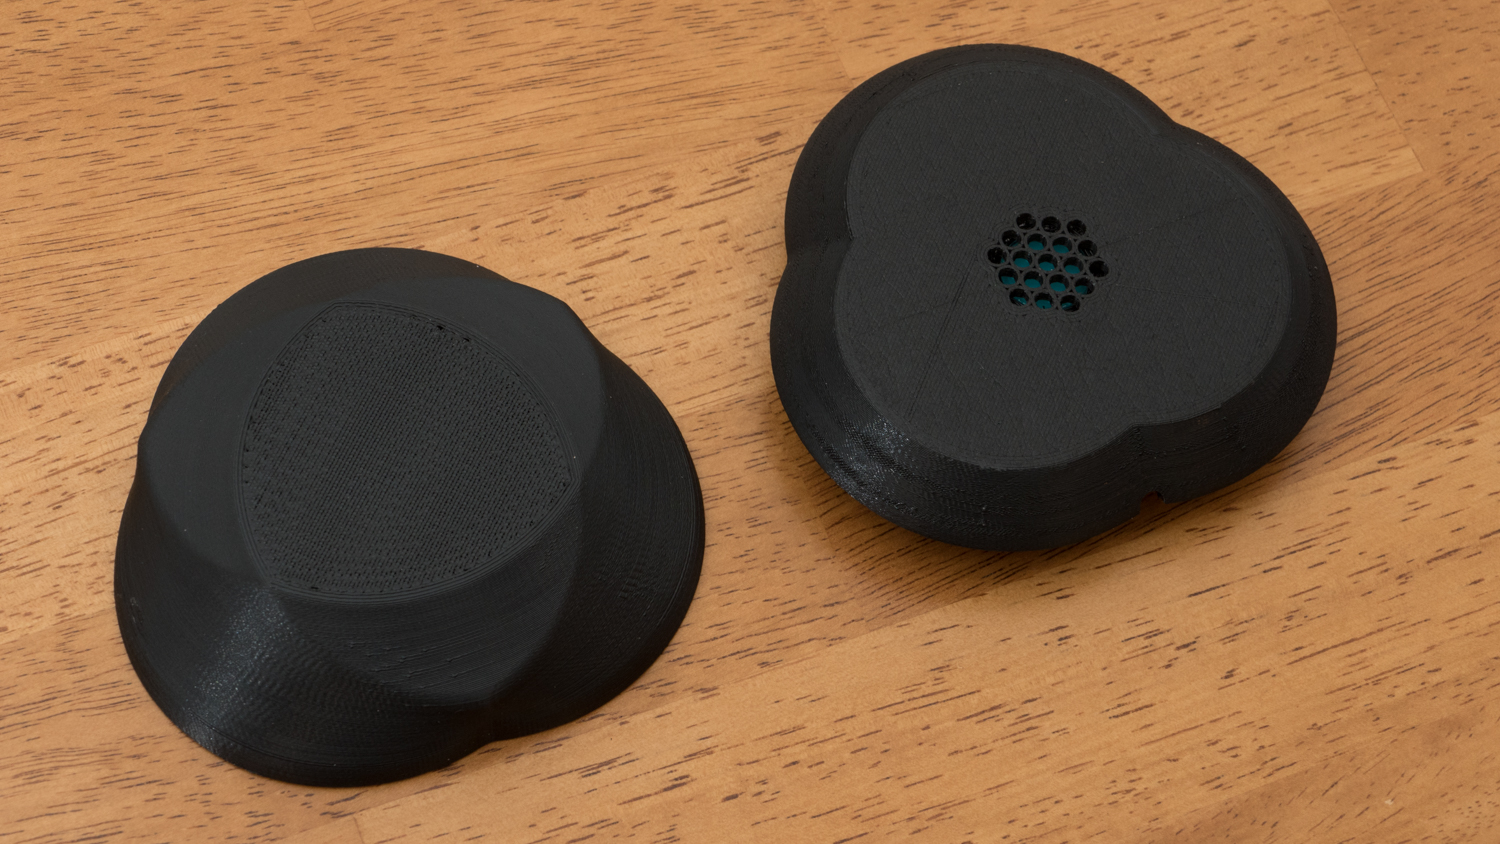
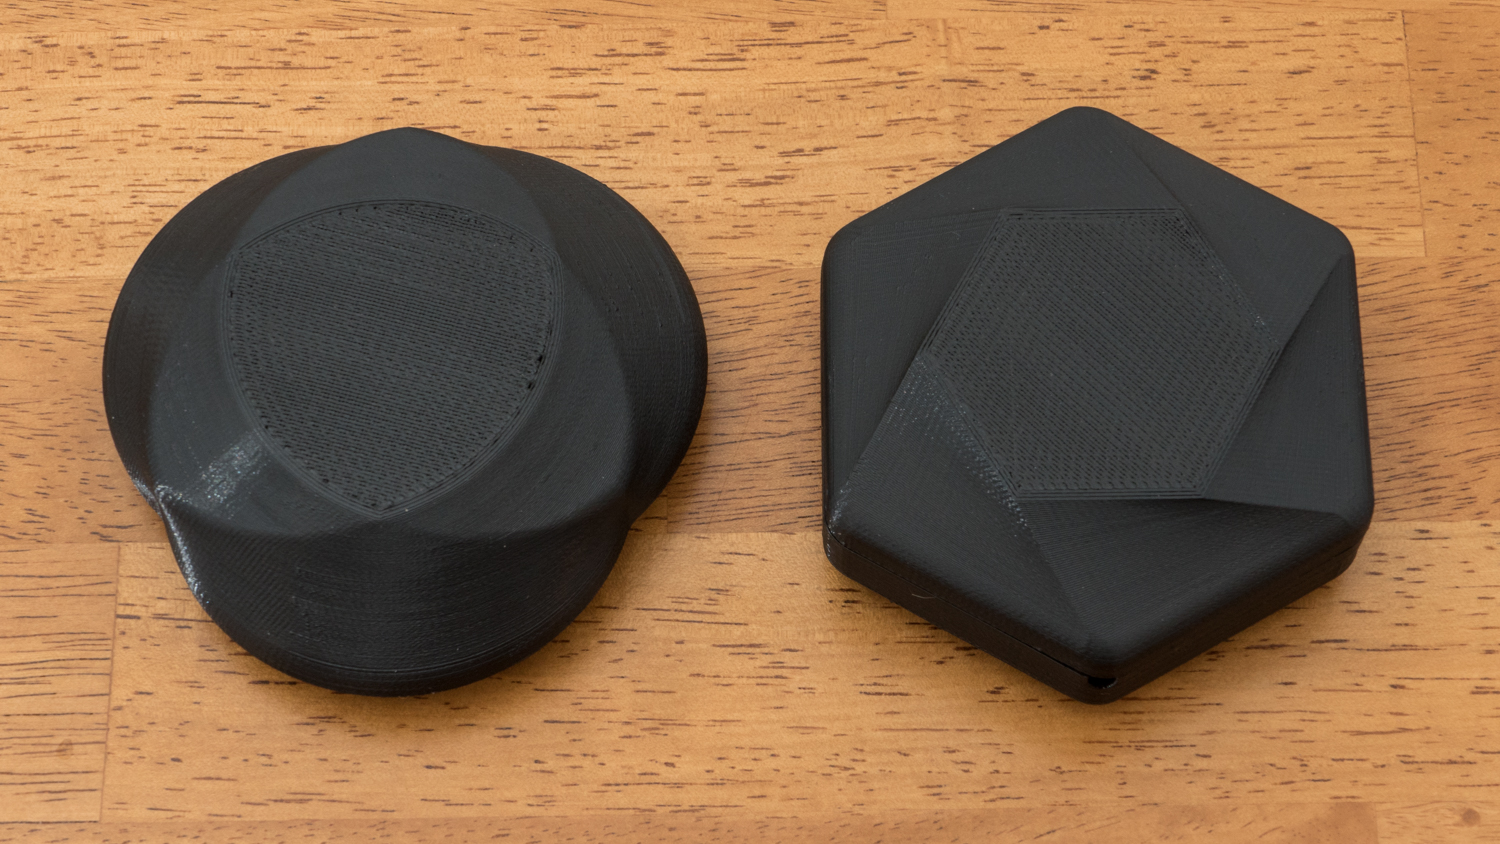
The design went well, all surfaces are 1.5” or thinner except for the square area on the top half. Making the blinder channels deeper may negatively affect the function of the device, so the likely solution would be hollowing it out from the outside and using the logo to cover it up in production. The protruding supports, pins and holes all have a draft angle of 2º or more, and a thickness of 50-80% of the shells 0.1” thickness.
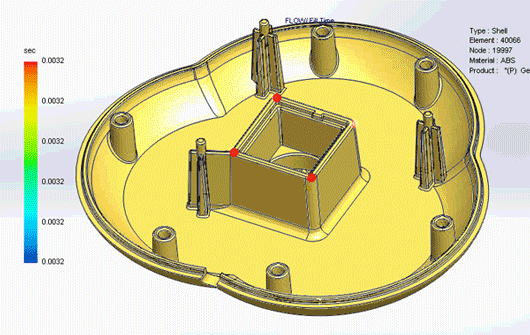
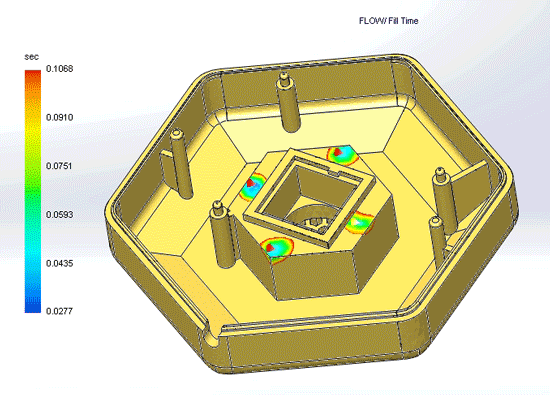
The fill time on the bottom was 2.36 seconds, about a second faster then the bottom section of the first prototype, though the side walls are lower so it’s not an even comparison. The average cooling time was 14.09 seconds, over 2 seconds faster than the first prototype.
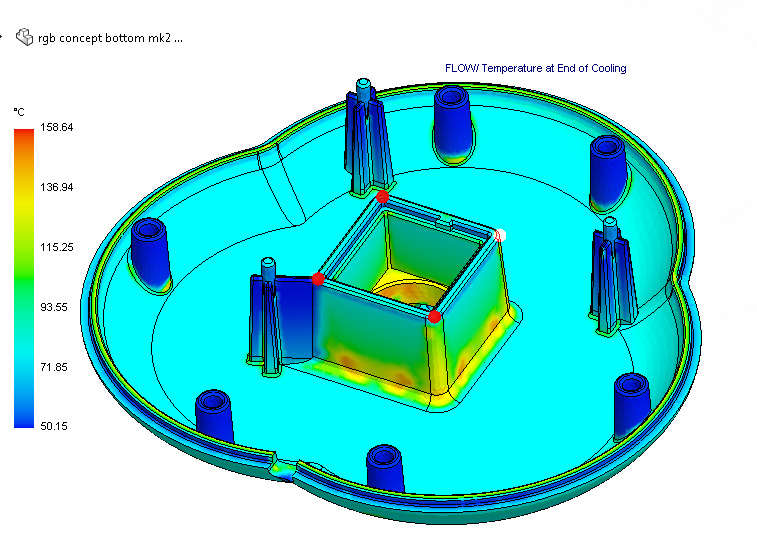
Big improvement here, the max temperature is over 40ºC cooler and overall the temperature is much more uniform with presumably thanks to the tinner walls. That last thing to do was print it and see how everything fits together, and how it feels as a physical object!